
Views: 222 Author: Tina Publish Time: 2025-02-27 Origin: Site


Content Menu
● Choosing the Right LCD Display
● Preparing Your Raspberry Pi Zero
>> Official Raspberry Pi Touch Display
● Troubleshooting Common Issues
● Enhancing Your Projects with LCD Displays
● Frequently Asked Questions (FAQ)
>> 1: What are the power requirements for LCD displays?
>> 2: Can I use multiple displays with a single Raspberry Pi Zero?
>> 3: How do I adjust the display orientation?
>> 4: Are touch-enabled displays compatible with the Raspberry Pi Zero?
>> 5: How can I improve the performance of my LCD display?
The Raspberry Pi Zero is a compact and versatile single-board computer that can be enhanced with various peripherals, including LCD displays. Adding a display to your Raspberry Pi Zero can open up a world of possibilities for your projects, from creating portable devices to building interactive kiosks. In this comprehensive guide, we'll walk you through the process of connecting an LCD display to your Raspberry Pi Zero, covering everything from choosing the right display to troubleshooting common issues.
Before diving into the connection process, it's crucial to select an appropriate LCD display for your Raspberry Pi Zero. There are several types of displays available, each with its own advantages and considerations:
1. Official Raspberry Pi Touch Display: This 7-inch touchscreen display is specifically designed for Raspberry Pi boards and offers seamless integration.
2. TFT LCD Displays: These displays come in various sizes, typically ranging from 1.8 to 3.5 inches, and are popular for their compact form factor.
3. OLED Displays: Known for their high contrast and low power consumption, OLED displays are ideal for battery-powered projects.
4. Character LCD Displays: These simple displays are perfect for projects that only need to show basic text information.
When selecting a display, consider factors such as size, resolution, power requirements, and compatibility with the Raspberry Pi Zero.
Before connecting the LCD display, ensure your Raspberry Pi Zero is properly set up:
1. Install the latest version of Raspberry Pi OS on your SD card.
2. Update your system by running the following commands in the terminal:
sudo apt update
sudo apt upgrade
3. Enable necessary interfaces (e.g., SPI, I2C) using the Raspberry Pi Configuration tool or raspi-config.

The connection process may vary depending on the type of LCD display you're using. Here, we'll cover the general steps for connecting different types of displays:
1. Connect the display to the Raspberry Pi Zero using the DSI (Display Serial Interface) ribbon cable.
2. Power the display using the GPIO pins or a separate micro USB power supply.
1. Identify the pins on your TFT LCD display (typically VCC, GND, CS, RESET, DC, MOSI, MISO, and SCK).
2. Connect these pins to the corresponding GPIO pins on your Raspberry Pi Zero.
Here's a common pinout for a 3.5-inch TFT LCD display:
| LCD Pin | Raspberry Pi Zero Pin |
|---|---|
| VCC | 3.3V (Pin 1) |
| GND | Ground (Pin 6) |
| CS | GPIO 8 (Pin 24) |
| RESET | GPIO 25 (Pin 22) |
| DC | GPIO 24 (Pin 18) |
| MOSI | GPIO 10 (Pin 19) |
| MISO | GPIO 9 (Pin 21) |
| SCK | GPIO 11 (Pin 23) |
OLED displays typically use I2C or SPI for communication. Here's a general pinout for an I2C OLED display:
| OLED Pin | Raspberry Pi Zero Pin |
|---|---|
| VCC | 3.3V (Pin 1) |
| GND | Ground (Pin 6) |
| SDA | GPIO 2 (Pin 3) |
| SCL | GPIO 3 (Pin 5) |
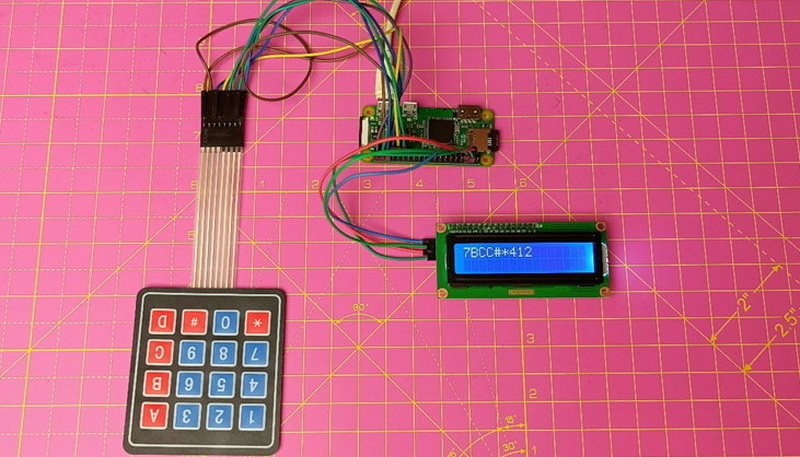
For character LCD displays, you can use either direct GPIO connections or an I2C backpack. Here's a typical connection for an I2C character LCD:
| LCD Pin | Raspberry Pi Zero Pin |
|---|---|
| VCC | 5V (Pin 2) |
| GND | Ground (Pin 6) |
| SDA | GPIO 2 (Pin 3) |
| SCL | GPIO 3 (Pin 5) |
Once you've connected and installed the necessary software, it's time to test your display:
1. For the Raspberry Pi Touch Display, it should work out of the box after a reboot.
2. For TFT LCD displays, you can use the fbcp (framebuffer copy) utility to mirror the HDMI output to the LCD.

If you encounter problems with your LCD display, try these troubleshooting steps:
1. Double-check all connections to ensure they're secure and correctly wired.
2. Verify that you've enabled the necessary interfaces (SPI, I2C) in Raspberry Pi Configuration.
3. Make sure you're using the correct drivers and software for your specific display.
4. Check the power supply to ensure it can provide enough current for both the Raspberry Pi Zero and the LCD display.
5. If using an HDMI display, try adjusting the config.txt file to set the correct resolution and refresh rate.
Now that you've successfully connected an LCD display to your Raspberry Pi Zero, the possibilities for projects are endless. Here are some ideas to get you started:
1. Portable Weather Station: Display real-time weather data fetched from an online API.
2. Digital Photo Frame: Showcase your favorite photos in a slideshow format.
3. Smart Home Control Panel: Create a touchscreen interface to control your smart home devices.
4. Retro Gaming Console: Build a handheld gaming device using emulators.
5. System Monitor: Display CPU usage, temperature, and other system information.
Connecting an LCD display to your Raspberry Pi Zero can significantly enhance your projects, providing visual feedback and enabling interactive interfaces. By following this guide, you should now have a solid understanding of how to choose, connect, and configure various types of LCD displays for your Raspberry Pi Zero. Remember to always consult the specific documentation for your chosen display and take proper precautions when handling electronic components.

Most LCD displays can be powered directly from the Raspberry Pi Zero's 3.3V or 5V pins, depending on their specifications. However, larger displays or those with backlights may require additional power. Always check the display's documentation for power requirements and consider using a separate power supply if needed.
Yes, it's possible to use multiple displays with a Raspberry Pi Zero, but you may face limitations due to the available GPIO pins and processing power. For example, you could use an HDMI display alongside a small OLED or character LCD for additional information. However, using multiple high-resolution displays may not be practical due to the Pi Zero's limited resources.
Display orientation can usually be adjusted through software settings. For the official Raspberry Pi display, you can modify the /boot/config.txt file to set the desired orientation. For other displays, you may need to use specific commands or modify the display driver settings. Consult your display's documentation for detailed instructions.
Yes, many touch-enabled displays are compatible with the Raspberry Pi Zero. The official Raspberry Pi Touch Display works seamlessly, while other touch displays may require additional drivers or configuration. When choosing a touch display, ensure it's compatible with the Raspberry Pi Zero and check for available drivers and support.
To improve display performance, consider the following tips:
1. Use a high-quality power supply to ensure stable power delivery.
2. Optimize your software to reduce unnecessary screen updates.
3. If using a graphical interface, consider using a lightweight desktop environment.
4. For projects that don't require a full GUI, use console-based applications or custom interfaces to reduce resource usage.
5. Overclock your Raspberry Pi Zero (with caution) to gain additional processing power for smoother display output.
[1] https://sudomod.com/forum/viewtopic.php?t=958
[2] https://thepihut.com/blogs/raspberry-pi-tutorials/how-to-drive-a-character-lcd-display-using-the-raspberry-pi
[3] https://circuitdigest.com/microcontroller-projects/interfacing-tft-lcd-display-with-raspberry-pi-zero-w
[4] https://www.raspberrypi.com/documentation/accessories/display.html
[5] https://www.instructables.com/Connect-LCD-to-Raspberry-Pi-Without-Breakout-Board/
[6] https://forums.raspberrypi.com/viewtopic.php?t=220205
[7] https://www.instructables.com/Getting-18-Inch-LCD-Display-St7735s-to-Work-With-R/
[8] https://www.youtube.com/watch?v=WHQOA0hEdoQ
[9] https://www.youtube.com/watch?v=3IhnewigIqk
[10] https://www.raspberrypi.com/news/how-to-use-the-raspberry-pi-touch-display/
[11] https://www.youtube.com/watch?v=oJRc_KyfSAE


